| iMAC
Internet
Setup
Assistant
What
you
need
to
get
started:
- An
account
with
AsburyUSA
- Your
username
- Your
password
- Your
Local
Access
number
- The
Primary
&
Secondary
DNS
numbers
|
 |
iMAC
-
Step
1
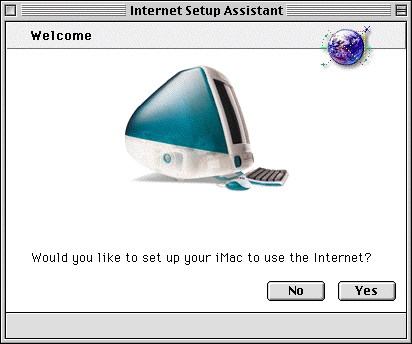
Open
up
the
Assistants
folder
and
double
click
on
the
Internet
Setup
Assistant
icon.
Click
on
Yes
to
continue.
iMAC
-
Step
2
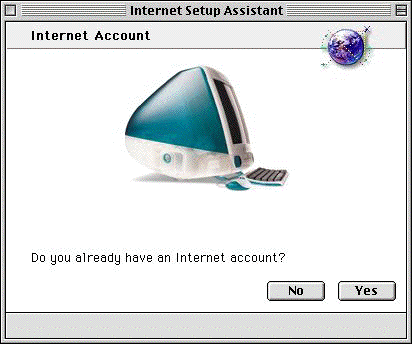
Click
on
Yes
to
continue.
iMAC
-
Step
3
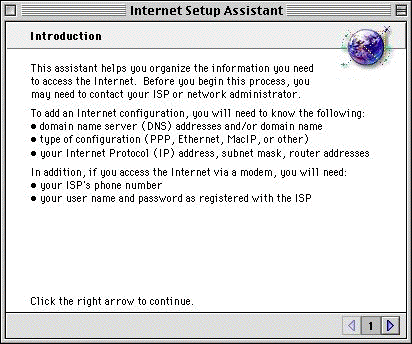
Click
the
right
arrow
to
continue.
iMAC
-
Step
4
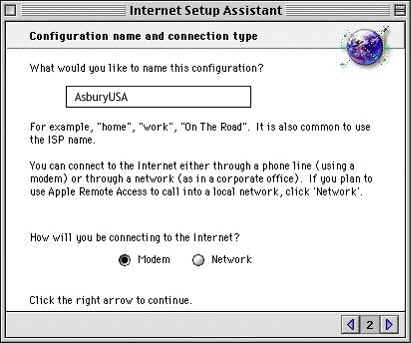
You
will
need
to
enter
in
a
name
for
this
configuration.
Also
ensure
that
modem
is
checked
before
continuing.
Enter
in
the
name
as
shown
above,
and
click
the
right
arrow
to
continue.
iMAC
-
Step
5
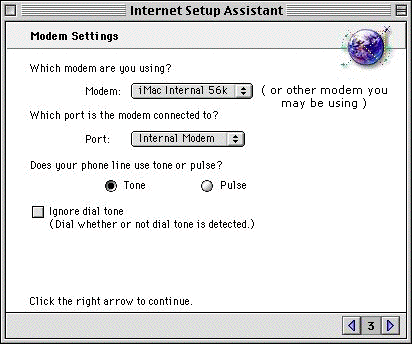
Select
the
modem
you
are
using
from
the
drop
down
list
above.
Ensure
you
have
the
correct
port
selected
and
tone
is
selected
and
then
click
on
the
right
arrow
to
continue.
iMAC
-
Step
6
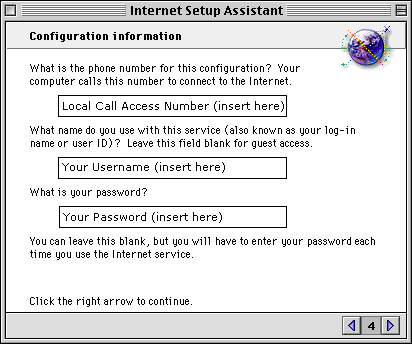
Enter
in
your
Local
Call
Access
number,
your
username
and
your
password
in
the
spaces
provided
(
as
shown
above
).
Once
you
have
done
this,
click
on
the
right
arrow
to
continue.
iMAC
-
Step
7
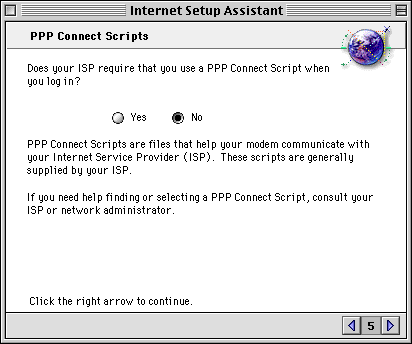
Ensure
that
No
is
checked
and
click
on
the
right
arrow
to
continue.
iMAC
-
Step
8
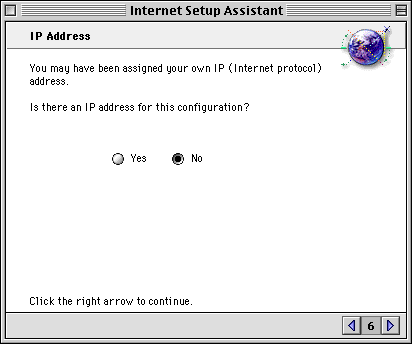
There
is
no
IP
Configuration
so
ensure
No
is
selected
and
click
on
the
right
arrow
to
continue.
iMAC
-
Step
9
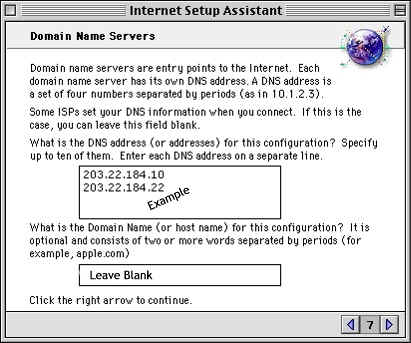
| Network |
Primary
DNS |
Secondary
DNS |
| te |
205.199.193.2 |
205.137.48.7 |
| qw |
4.2.2.1 |
4.2.2.2 |
| uu |
198.6.1.218 |
198.6.100.218 |
| st
&
fi |
216.126.128.40 |
216.126.136.250 |
Enter
in
the
DNS
addresses
as
shown
above,
as
well
as
the
Domain
Name
as
shown
above
and
then
click
the
right
arrow
to
continue.
iMAC
-
Step
10
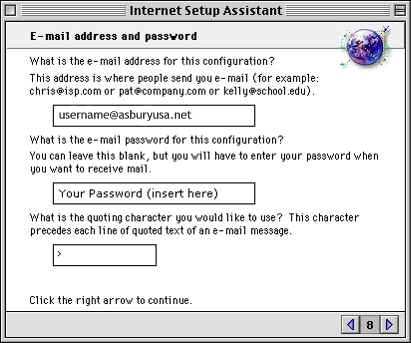
Enter
in
your
email
address
and
your
password
in
the
spaces
provided
(
as
shown
above
)
and
click
on
the
right
arrow
to
continue.
iMAC
-
Step
11
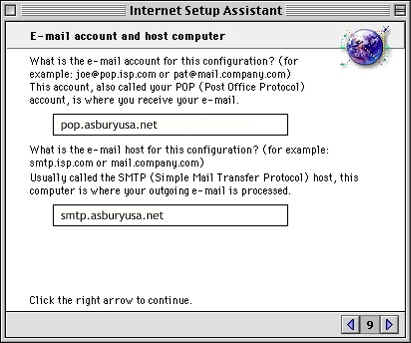
Enter
in
the
POP
as
shown
above.
You
will
also
need
to
enter
in
the
SMTP
of
which
details
are
shown
in
the
above
graphic.
Once
you
have
done
this,
click
on
the
right
arrow
to
continue.
iMAC
-
Step
12
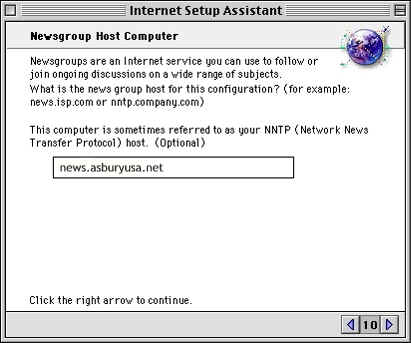
Enter
in
the
News
address
in
the
space
provided
(
as
shown
above
)
and
click
on
the
right
arrow
to
continue.
iMAC
-
Step
13
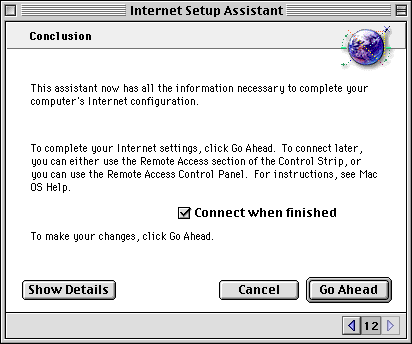
You
have
now
finished
configuring
your
iMAC
for
connection
to
the
internet.
To
complete
your
Internet
Settings,
click
Go
Ahead.
To
connect
later,
you
can
either
use
the
Remote
Access
section
of
the
Control
Strip,
or
you
can
use
the
Remote
Access
Control
Panel.
|
